Showing posts with label How to. Show all posts

Wednesday, August 21, 2013

Alternative Wig Styling Method

Posted by Unknown at 8:15 AM 0 comments
Before
A new bride shared her creative method for styling her new wigs.  She only had a Styrofoam head but was able to mount it on a paper towel holder in order to curl her wigs with a curling iron!  I thought this was a creative and great alternative for anyone who doesn't own a wig stand clamp!

Of course if you want to buy an inexpensive wig clamp you can find one here: Manikin Clamp * Wig Block Holder


And you can get a canvas block styling head here: Canvas Wig Head (23" 24" 25") (22" Circumference)

Although resistance is not needed to make curling iron curls, it is necessary to have tension when blow drying a wig straight.  So it would be good to have a stand that is sturdy and resists pressure.

After


Thursday, February 14, 2013

How to style Full Bangs on a wig with a Blowdryer

Posted by Unknown at 7:23 AM 0 comments
Here is the latest wig styling video.  In this video we are showing how to style full bangs (full fringe) on a wig (sheitel).  This wig is a Blush Pony Wig, which is made of processed hair. This can work right after a Wash and Set, or you can touch these up later. Bangs need to be re-set more often because people tend to sweat around the hairline.


I hope you find this helpful!  You will need a large round brush and a blowdryer in order to do this at home.  It also helps to have a spray bottle to slightly dampen the hair for touch ups.


Monday, February 4, 2013

How to Style Sheitel Side Bangs

Posted by Unknown at 2:15 PM 0 comments
After many requests, I am finally able to bring you the next wig styling video. This video is all about styling side bangs and we show you two methods: Blowdryer and Curling Iron.  There will also be a video on how to style a full bang.


Wednesday, August 10, 2011

Curly Wig Wash & Set

Posted by Unknown at 3:05 PM 3 comments

Hi-
How do I wash my curly sheitel at home?  I have tons of knots.  How do I get them out without ripping all the hair out of the sheitel?  Also, what are the recommendations for daily maintenance of my curly sheitel? For example, how often should I brush it, gel it, and wash it?  Thanks!!!!
-L

Dear L,
Well first you have to comb out the knots.  BUT BEWARE, this is a very delicate process that may take a long time and you need to be patient and use the right tools.  You will need:
A Wide tooth comb:
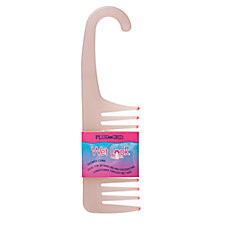
Plugged In Wet Look Shower Comb

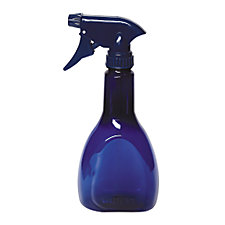
Spray bottle
Spray Bottle With Lengthened Trigger
and spray on detangler or conditoner.

Hairtrition Color Protect Leave-In Detangler

 Use sectioning clips to separate the hair into sections:  Start with the lowest thin layer down.
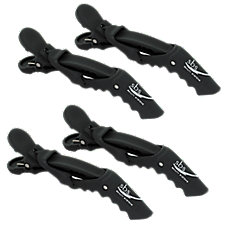
Color Trak Tools The Croc Clip
Spray on water and/or detangling conditioner onto layer, and very gently from the ends (bottom) up, slowly and carefully comb downward until the knots are detangled.  once the section is detangled, let the next thin layer down and repeat the process.
Once the entire wig is detangled, the wig can be attached to the foam head and the normal washing process can commence.  CAUTION: you must be extra careful while washing to spread the shampoo and conditioner downward on the wig and never upward against the curly cuticle.  That will just create large knots and tangles.  You can use watered down shampoo or as little shampoo as possible.  I try to just use a little close to the "roots" to clean the parts that get sweaty, and not necessarily apply the shampoo to the ends which tend to get dry, they get cleaned by nature of the water running down the hair to the ends of the roots. 

Run the soapy mixture downward using a lot of water.  Rinse.

Apply conditioner in the same manner but do not apply the conditioner to the multi-directional part of the sheitel because it can cause the knots (individual hairs that are handtied) to come loose and come out of the cap. 

While conditioner is applied, run fingers through hair to make sure the knots are still non existent.  If knots are present GENTLY try to detangle with fingers or wide tooth comb while conditioner is applied.  However, knots should not be present, and its a little risky to do this while wet we can do this in the next step as well.  Rinse out conditioner unless conditioner is a "leave in conditioner" which is sometimes best for curly hair.

Take wig off of head and gently place into a bath towel and enclose.  Let it dry for 5-15 minutes in the towel.  Then gently open towel and place on wig head, remembering to only pin near the ear clips as shown in the straight washing video.


There are three methods of drying at this point.
1. Air dry and add curling iron curls later (a little bit of Biosilk
GVP Silk Treatment
GVP Silk Treatment
GVP Silk Treatment gives hair a smooth and silky feel while providing a brilliant high gloss shine. Repairs split ends and gives hair incredible shine with no build up.


can be added at this point)
2. Scrunch with or without product and air dry for a natural wave or (mousse, biosilk or curly hair product can be applied to hold scrunch look, I would avoid gel though because it is crunchy and sticky)
3. Blowdry with a diffuser attachment on a blowdryer (products safe for heat can be used in this instance) .  While using the diffuser attachment as shown below.  Scrunch sections of hair with hand upwards while blow drying with diffuser. 
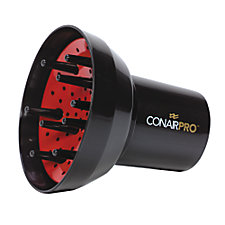
Conair Pro Universal Tourmaline Finger Diffuser
If you applied leave in conditioner you may not need an anti-frizz product like biosilk.  Use very little because it can make the hair look oily.  Remember shampoo is the enemy of curly hair because it encourages frizz.  Conditioner is our friend but must be used in moderation and well rinsed to not appear oily.

For maintenance you can use the spray bottle and comb to remove knots, you can spruce it up with a little product and scrunch and let air dry.  If you are trying to "maintain" a curling ironed wig without washing, it will be tough to fix individual curls, but it is nonetheless doable. 


Please post questions below as comments.  Best of luck.

-Chavi

Sunday, June 19, 2011

Setting a wig as a Pony

Posted by Unknown at 7:50 PM 2 comments
Some of you may remember my review of my Freeda Riva which I purchased in 2008.  In the past year or so I had really gotten tired of the cut and texture and starting wearing my falls instead.  I didn't like how thickly the hair framed my face and I believe I look so much better with the hair out of my face like when I wear my fall.  A few months ago I decided to pull it back in a ponytail to make it wearable and I realized that it actually looked kinda good.  The problem however was that the wig was set in a deep side part meant for side part side bangs look.  So I decided to do a full wash and set (it was dirty anyway) and to change the multi-directional scalp part of the wig to be angled backwards so the hair fit nicely into a pony tail holder.

For instructions on washing please check out my other videos found here.  To change the part I very delicately combed (with a very wide toothed comb) small sections of the part backwards until the hairs were no longer parted to the sides.  This video starts once the hair was parted and divided into sections.  Not shown on the video is how small the sections I split the top layer into (about an inch wide) once I got to the multi directional part, to make sure the hair was blown flat.  Watch the video and enjoy!!!


The finished product turned out to be great!  I also changed it to be half up on Shabbat and it looked great because the top layer that was pulled back into the pony looked natural!

Monday, March 14, 2011

Frizz Test

Posted by Unknown at 2:25 PM 1 comments
I get a lot of emails during summer from women complaining about their "pouffy", "frizzy" wigs.  As it turns out, wigs that seem nice and beautiful in the salon can become huge and frizzy as soon as humid summer rolls around.  I heard a story of a particular sheitel shop where the woman runs a dehumidifier in the studio to keep the wigs smooth looking.  That is so deceptive!  As soon as that girl steps outside the wig could become frizzy.

Products can help, but sometimes its the particular hair type that is more prone to frizz than others.  Wavy hair that was blowdried straight will gradually get wavier as the humidity goes on.  I thought of this recently.  I took me and my Milano Bandfall to Florida in February (yes, it was fabulous).  Anyway, I wore my bandfall bump style, as it turns out my real hair was really frizzing up, but my processed Milano pretty much stayed the same.

Maybe it was the perfect combination of hair sprayed curling-iron-curls mixed with dirt and grime.   Either way, it worked out fabulously.

Then this morning the frizz test occurred to me.  I was running my shower on just hot for 10 minutes as I wasn't able to get into it as soon as I would have liked, and when I came back the windows and mirror were completely fogged and there was a thick layer of steam in there.  People should ask their sheitel machers if they can take it home for a night, uncut before they commit to buying it so they can test whether it will frizz in humidity.  You can create that humid environment in your very own bathroom!

Please note how much my real hair frizzed (without any product in it) contrasted with the Milano made of processed "European Hair'" and with some hairspray stayed flat. 

Friday, February 18, 2011

Replacing Wig Snap Clips

Posted by Unknown at 9:20 AM 3 comments
Most wig wearers have probably experienced the following scenario: After a year of wearing your favorite wigs one of the snap clips breaks or sometimes comes loose. Usually a wig wearer will bring the wig to their sheitel macher who probably charged $10-$20 to replace the clip, when in actuality the clips are available for less than $1.00 and all it takes is a little sewing skill.  My recent situation was that I bought a wig over the internet that did not come with side snap clips, only a center comb which I found basically useless for keeping it secure on my head.

Step 1: Obtain Snap Clips
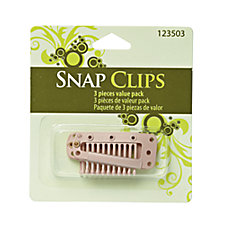
I found a set of tree snap clips from Sally's Beauty for $1.99. 
Hair Extension Clips
They had this light color pictured right, and black.  I bought the light one since the wig is blond. 

Step 2: Needle and Thread
First you must thread the needle.  I like to use about 4 feet of thread at a time because I was always taught to double up my thread and I had threading needles so I'd rather deal with a thread tangling then having to re-thread 3 times during the process.  I loop the thread through the eye of the needle, then make the 2 ends meet, I tie a knot by wrapping both ends around my finger a few times and then rolling tightly towards the end of the finger, it usually produces a little string that you can then pull on and the threads knot.  Or you can just knot the ends manually, but do not do a slip knot.

Step 3: Find Proper Clip Placement
It is very important to have the combs facing into the wig.  Once I spent 10 minutes sewing in a clip and I sewed them in facing out, which was incorrect, I then had to start over.  Secondly, I like to have my clips closer to the ears and father from the top of the temples, because when I used to have them by the temples (especially on falls) I would get terrible headaches.  Keep in mind that I do not even clip my clips, I just clip them to my head while open.

Step 4: Sew
For sewing the clips, I use the four holes on the clip and basically anchor each one to the wig.  Figure out which part of the wig will hold the first hole and loop the needle and thread through the wig cap, I usually make a little knot by looping my needle through the two attached threads and pulling to the end which the end knot will be against wig cap.  I then loop around the edge of the clip hole, into the cap, back up through the hole, about 3 or 4 times until it seems secure.  I then tie a knot on the tread to secure it.  I repeat the process for the three other corners of the clip.  I find it helpful to place the wig on a wig head inside out.  If you see the picture above you can see my white thread and how there are tiny knots securing each corner.

It is also a good idea to move your clips around every few months if you are having thinning hair or balding as a result of wearing your wig frequently.  Moving the clips should give the section of hair that has thinned time to regrow.  If you have a handtied cap please be very careful about not ripping your cap, it is best to sew the clips in the ear area, which is usually reinforced, they very edge of the wig should be stronger and serve as a good mounting point.  Additionally clips could be sewn into the bottom of the wig to allow the wearer to wear a more natural ponytail.

Hair Extension Clips

Sunday, January 9, 2011

Video: Dying a Wig at Home

Posted by Unknown at 12:17 PM 4 comments
Here is a video I made of my most recent dye project. The wig was a human hair Milano Collection Wigs fall.  It was originally 12/14 but it oxidized.  I used Clairol professional hair color in shade 5AA lightest very ash brown with equal parts level 20 creme developer in hopes to dye it to a light ash brown shade. 

The project was not entirely successful, as the dye was not equally distributed throughout the hair.  I should have used twice as much dye and developer and spread the mixture throughout the hair while wearing gloves.  I believe the 20 minutes process time was correct. 

I found a great blog post in which the author (a professional colorist) explains how hair color works here.  


Tuesday, August 31, 2010

Going from Curly to Straight without Wash??

Posted by Unknown at 3:46 PM 0 comments
Hi Chavi,
If i want to straighten my shietel is it best to just use a hairdryer like in your video or can you use a hot straightening iron?  If i were to leave it to dry naturally and then curl it say for a function or shabbat can i then straighten it afterwards without washing it or is that not advised. if yes can i use an iron or should i use a hairdryer?
Also, when blow drying my full sheitel do i have to worry about melting the skin?
Thanks so much for your great website. it's been really useful.
I've not yet styled my sheitel myself but i did watch my sheitel machar do it the other day so i'd know how. she didnt' spray it with hairspray after styling it - should I do that? Would it hold much better? it actually went a bit frizzy as it was raining when i went out. would hairspray help prevent that or serum perhaps? my natural hair was always really easy to manage that i never had to put products onto it!
Thanks,
RC

RC,
Anytime you apply direct heat (i.e straightening or curling iron) there is a slight amount of damage put on the hair. 

It is recommended to let a wig air dry when you are going to be curling.  If you try to flat iron the curls then you will be fighting against the hair cuticle which was set with a curling iron, thus, it will be harder to get the hair straight and could cause more damage than necessary... I would wash it after the curls..

About the blow drying.  It will not melt the skin, but it could burn it.  Make sure when you are blow drying the cap that you constantly move the blowdryer around as shown in the video so it doesn't burn it.  Also, you can hold the blowdryer a little farther away to help this.  Refer to the blow drying video for more information.
 
Finally, treat your sheitels better than you would treat your own hair.  For example, if you had your own hair styled curly in an updo for a wedding with hairspray you would certainly wash it before blowdrying it straight.  So, you should give your sheitel the same treatment as one would do to their own hair.  I've never heard of someone just using a flat iron over their styled updo in order to fix it without a wash in between....  The hairspray would start smelling bad from the heat of the iron and become sticky... GROSS!
Hairspray will help the curl/wave stay longer and prevent frizz.  However, it will make it a little more prone to knotting when there is spray on it.  I used a soft brush on the wavy styled sheitel after I take it off to keep it from knotting.  It has been holding up really well and doesn't look frizzy yet... but I don't live in a humid climate.  I prefer a little hairspray so the wavy style lasts longer, which ultimately means less washes and less exposure to heat. 

Serum could work but if you put too much on the hair it can look oily.  You want to put hardly any on at all and make sure its well spread over your hands before putting it on.  This should be applied as a final step after either blowdrying or ironing is complete.

To answer the first question.  Blow drying to achieve straightness is recommended.   It would be bad form for a hair stylist or sheitel macher to make their living by flat iroing air dried hair.  Usually a good blow dry will work extremely well.  Environmental factors such as humidity and hair texture could mean that it is poofier than desired, but for the most part someone who knows what they are doing should be able to set it properly with a blow dryer.  There are some people who desire the "flat ironed look" and would ask their stylist to iron AFTER doing a complete blow dry, a sacrifice that does inflict slightly more damage on the hair, but can look oh so sleek...

Take care,
Chavi

Friday, August 27, 2010

Alternative way to Dye - from AskChavi Reader

Posted by Unknown at 10:04 AM 6 comments
Hello Chavi,
 
I read your blog and watched the videos and I just loved all of it! I do my own sheitels and I am always looking for ways to do it better :) I have colored my sheitels and I have found a way to do it without ruining the skin part. I have colored almost all my sheitels :) I just colored my Milano sheitel and it came out so nice and natural :) it was Naomi color (very, very blond with lots of highlights) and now it is dark blond with light blond highlights. My fall oxidized and became too light and I colored it light brown. So here is how I do it. I either buy professional hair color and peroxide separately or a hair coloring kit. I mix the color according to the instructions & then I mix it with 1 quart of warm water and stir until color is mixed really well (make sure there are no globs of color or they will adhere to the hair strands and make a sheitel appear blotchy). Then I put my sheitel in and make sure it is saturated throughout with the mixture. I usually leave it in the mixture for 15 to 25 min depending on the desired effect. If I want to just slightly darken a really blond wig, I leave it on for 15 min, if I want it to saturate well with color and the wig is darker blond, then for a bit longer. Afterward I rinse it well and then wash it as usual. I did lighten one sheitel and it came out nice as well. I would not recommend using ashy colors as they tend to turn hair greenish tint. I usually use natural colors and they work really well. I hope this info is useful.
 
Here is the website from where I got the info on wig coloring:
 
All the best,
S

Thursday, August 19, 2010

Wig Review: Milano Band Fall 12/14 Makeover

Posted by Unknown at 9:48 PM 3 comments

Back in September 2009, I bought a Milano band fall from one of their "out of town" distributors.  The color was a 12/14, which looked like a dirty blonde but not that reddish.  The hair looked thick and nice and so I decided to purchase it.  I believe it was $950 because it was on sale or something.  Anyway, it has been a pretty good piece.  The few problems I had with it: cap size too small and color oxidizing to this weird shade, I fixed.  This post is not only a review of a fall, but a story of how I optimized my wig.

So here it was.  My dull fall, turning into a dry oxidized piece...

Before
My review:  This wig is fairly typical.  It has machine wefts.  It is a fall, so there is no skin top.  The hair on the crown is sewn in to fall backwards like a good fall too.  The hair on this wig was much nicer than my first Milano full wig.  It never knots, which is a plus.  It is definitely treated hair and far from "Virgin European".  Because it was treated and dyed and probably originally partially Chinese, the blonde hair oxidized pretty fast.  Let's see... I worked in an office and probably only experienced 5 hours of direct sunlight in this wig per week, and it got pretty badly oxidized within months.  My definition of badly oxidized is: the top turned a mono-chrome shade of blonde while the under-layer remained darker.  The cap being too small was always uncomfortable so I decided to do something about it.

FIRST I took care of the color.  I bought a box of light ash brown dye and weaved low-lights through the entire sheitel using the technique pictured below.  Note in the picture how the base color of the wig started to look really red.  I chose an ash shade to minimize the redness.  Then I rinsed the wig and applied conditioner and let the wig dry.


Okay, a few weeks later I decided to re-wash the sheitel and to set it in curls.  The other reason for me to wash it was to stretch the cap.  Because it is constructed of machine wefts, it is quite a durable piece.  While wet, I placed the wig on the styling block and used 4 T-Pins to stretch the four corners to its limit (near the ears, and near the back corners of the neck area).  The stretching was a GREAT success, it fits extremely comfortably now.  Then I let the wig air dry and curled my wig as per the instructions in my video.

A week after curling the wig and spraying with just a quick drop of hairspray.  Here is a picture of the finished product: dyed, stretched and curled a week after the set.  It does hold curl rather nicely, eh?

On a side note, I integrate about a 3 inch x 3 inch section of my bangs into a "bump" over the front when I wear my fall and have told that the hair is a "perfect match".

RATING:
Weight/comfort: C before stretching / B+ now
Hair Quality: B
Skin top: N/A
Durability: B+
Appearance: A-
Cap Construction: B

Overall: B

Tuesday, July 13, 2010

Dear Chavi: My Poor Freeda

Posted by Unknown at 3:55 PM 2 comments
DISCLAIMER:  Every wig is different, and every sheitel macher has sold amazing, good, fair and bad pieces.  Every sheitel company has produced amazing, good, fair and bad pieces.  Unfortunately buying a sheitel requires mazal (luck).  Every woman will probably end up with at least wig that she is unhappy with in her lifetime.  None of my posts are intended as loshon hora towards a company or sheitel macher, rather just to discuss problems people have had with particular pieces.  Mentioning the brands are necessary in order to provide context into price and reputation of each individual wig. 
Dear Chavi,
When I was a kallah 8 yrs ago, and as a clueless BT, I was persuaded to buy 2 custom Freedas (a full and a band) for a small fortune. I never loved them, simply because I never ended up with a style that felt comfortable for me til a couple years ago when, the hair and hairline of the full sheitel were already way too thin. There was  a hole in the cap, too, and the hair was really oxidized, even after being dyed twice over the years. But the hair on both sheitels was still amazing, just thinner, after all those years. Silky, natural, gorgeous hair. But with a cut that was more "me" I knew what to look for when getting a new one.
I think most kallahs have this problem with their first sheitels.  It is hard to get used to ourselves in a wiggy style, as opposed to how our hair looked before marriage.  It looks like you spent a lot of money but they lasted for a long time.  You must have worn them a lot if you ended up with a hole in the cap!  Was that from washing or from general wear?  Have you considered adding more hair into the full sheitel and repairing the cap and maybe getting it cut?  You wore your two kallah sheitels for 6 years!!! and the fall still looks good??  That is INCREDIBLE
So, for my second attempt at buying a sheitel, I went back to the Freeda warehouse, no sheitel macher this time, and thought I would just get a precut.  I got the Riva Long in a medium brown. I tried to get one that had as little red as possible. Oxidation is a problem with Freedas. It has some natural highlights in it - I never dyed it. Who knows how much they processed it though before i got it. Also, I think it dries straight but I've never washed it myself. I never noticed any texture or frizzing problems til now. I don't need a special size, but i wanted the Freeda quality. I got a great sheitel. Hooray for me....then got a cool cut. A couple inches below the chin, angled bob with the front a bit longer than the back. Kind of modern looking. The problem? It's only been washed a few times over the past year and a half since I really only wear it 4 times a month but I just noticed that it is full of split ends and the actual ends feel a bit rough. My 8 yr old band fall has better looking hair at this point. The split ends go all the way up the locks.
When did you first notice the split ends?  How was it cut?  If it was cut with a blade on the ends instead of scissors it can cause split ends to form faster. 
1. I just moved and tried out a new sheitel macher, who is a friend so i would feel bad of accusing her of anything - but did she do something unintentionally? Was she too rough on the sheitel?
Do you think it is possible that maybe she just isn't a very good sheitel macher?  If you noticed in my videos, my sheitel macher pointed out that an improper blow dry can make the hair look frizzy and appear to have split ends which could be minimized if set well.  How many times has she washed it?  When did the problem start?
2. The climate here is hot and humid - is that making the split ends show? The band fall looks totally fine but maybe b/c it hasn't been outside in this weather is why it looks better. But i think it started to look like this in NY; i honestly was so stressed and busy about moving i just wasn't paying attention. But at a wedding I wore it to in November, it definitely didn't have this issue...
The humidity could be causing the frizz to show. 
3. Is my sheitel a lemon? Is it slowly getting "straw" hair? No $1700 Freeda should look like this after a year and a half!
As I stated above, every brand produces good and bad pieces.  Afterall, it is a sewn item and there can be defect.  MAYBE the current condition is a combination of how the sheitel was cut, how it is being washed, the weather and back luck?  I agree it seems like a lot of money spent if the piece is actually headed towards an early retirement after a year and a half.
I could call Freeda but it's not like they could fix one small part of the wig. The whole thing has split ends. They're not going to replace it at this point, so long after the sale and after 2 sheitel machers have handled it. The color and cut and fit still look great so people still think it looks nice but when you look up close you see all the split ends and when i run my hand up the hair, against the grain so to speak, they feel so rough. What do i do??? And I'm no longer in NY so I can't go to them in person....
It doesn't hurt to ask.  I mean, they can say no, they may not do anything, but maybe some good will come of it.  Maybe they can sell you a new one at cost or something or half off.  Again, maybe it just needs to be set with a certain hair product to make it look sleeker. I used to put hair serum on my naturally wavy/frizzy hair.
I'm really upset over this. I hate sheitel shopping, I hate the expense and I was so happy to have something i liked wearing after all these years. If I spent so much on a sheitel that's not gonna last more than 2 years, I'm tempted to buy a cheap one next.

Advice?
Cheap sheitels seem like an option.  You have a darker hair color so you may be happier paying less money.  Also, you are wearing a shorter bob style which would only cost about $500 in a cheaper brand.  When we pay over $1500 we expect our sheitels to last at least 3 years, so I understand your concern.  However, a cheap sheitel might only last one year or less.  I really hope that the Freeda customer service comes through.  

Another thing to consider: sheitels lasting 8 years is unheard of these days.  I only know a few people in that boat and they had really expensive custom sheitels ($3500-4000).  You should consider yourself lucky that your fall and kallah sheitel lasted for 8 years.  Maybe they aren't making them as well as they used to.  Or.. you could have just been unlucky with your purchase.  I would love to hear what happens and if styling products can help hold the style better.  Another comment: longer sheitels have more room to be trimmed after split ends form, whereas shorter styles like your bob do not have much wiggle room in case the ends do become broken.  


And don't worry, the sheitel doesn't look that bad in the pics you sent....
Regards,
Chavi

Friday, July 9, 2010

How to get curls to hold longer

Posted by Unknown at 8:38 AM 0 comments
Dear Chavi,
What product should I use to keep my curls from falling out when I set my wig?
Thanks,
R

Dear R,

TRESemme European Tres Two Hair Spray, Extra Hold , Climate Control Formula 11 oz (311 g)My sheitel macher recommends Tresemme Hairspray for setting curls.  The best part about her recommendation is that Tresemme is a very affordable hairspray.  When applying, don't spray too much, it can cause hair to become sticky and clumpy. Each hair texture requires a different amount of product to keep it curly, and some will not hold curl no matter how much hair product you put in it.  Also, do not spray the hairspray before curling with the curling iron...

Best of luck,
Chavi

Wednesday, June 23, 2010

Removing Hairspray

Posted by Unknown at 9:52 PM 1 comments
Dear Chavi,
I had my sheitel done for a wedding. What is the best way to get the hairspray out?
-R

Dear R,
This might sound rather simple but... Shampoo it!  Hairspray is intended to be washed out after use.  If you are washing at home and a residue is still present, I would recommend washing it again, making sure all the hair is getting wet and that you are gently rubbing the shampoo through it.  Afterward you can condition and dry.  Unfortunately, the only way to get it out is washing.  I would recommend having it professionally washed and set if you are having trouble getting it out at home.

Best of luck,
Chavi

Dyeing Sheitel at Home?

Posted by Unknown at 9:17 PM 2 comments
Dear Chavi-

I am thinking of dyeing my sheitel a darker color. I am also thinking of doing it myself.

What are the pros and cons of such an adventure?

Thanks!
KD

Dear KD,

Sheitels, like the hair on our heads, oxidizes and fades over time from exposure to the sun. Because of this effect, many wig wearers are inclined to dye their sheitels at one point or another when the color changes to a different color. If your sheitel is made of human hair, it can be dyed. There are two routes: Professional and At-home.

The professional job will be more expensive, probably $50-100 depending on where it is done. However, a colorist expert has ample experience and knows how to get the desired shade.

If you are attempting at home, I would advise buying two boxes of hair dye which cost about $8-9 each. Secondly, make sure to read the box. You want a permanent color and you want to make sure the dye is made for the color range. Also keep in mind cool versus warm tones of each shade and purchase accordingly. Instructions for dyeing a wig can be identical to dyeing your own hair except the wig will be pinned to a head. It is advisable to do a strand test to make sure you get the desired color result. It will be important that the dye covers every strand of hair. This can be done with a comb. It is best not to get the dye on the cap because it could leave a stain.

If you are desiring a dye job because your wig has faded it is likely that the wig will fade again, because of this, the cost of professional dye jobs could really add up in the long run if they are required every 6-12 months.

Lastly, while I would be comfortable with dyeing a piece darker I would NEVER advise someone to dye a wig lighter or put in highlights at home. The chemistry for lightening is more complicated and requires more knowledge. Going darker with a professional creme based dye is pretty self-explanatory. Also, if the hair has already been dyed it would make coloring at home more difficult (namely lightening) because of the way the colors interact. 

There is always the possibility of not getting the desired result, which could end up needed a professional to correct it anyway.  However, I have friends who had little coloring experience who followed the instructions and successfully dyed their wigs darker at home.  Good luck!


Tuesday, June 22, 2010

How to Curl a Sheitel with a Curling Iron

Posted by Unknown at 6:44 AM 9 comments

Dear Chavi,
How do I set my sheitel to be curly?
-B

Dear B,
Watch THIS video.


Something to keep in mind. Some sheitels will not hold a curl. Also, you CAN burn the hair if you hold the curling iron for too long, so curl at your own risk!

Special thanks to "Ruchie" for appearing in my video!


This was part three of my series on how to wash and style a wig.  Check out the other parts under the "how to" label.

Monday, June 21, 2010

Blowdrying a Sheitel Straight

Posted by Unknown at 8:31 PM 7 comments
Dear Chavi,
How can I blowdry my sheitel straight at home?


Wash and set your sheitel at your own risk. Keep in mind that this sheitel macher has years of experience...

This was part two of my series on how to wash and style a wig.  Check out the other parts under the "how to" label. 

How to Wash and Set your Wig

Posted by Unknown at 4:36 PM 1 comments
Dear Chavi,
I live in a place where there is no professional wig stylist. I was wondering if you could show me how to wash my wig at home?
Thanks,
R

Dear R,
Please see the video below which shows how to wash your sheitel in your very own sink.
Enjoy,
Chavi


This was part one of my series on how to wash and style a wig.  Check out the other parts under the "how to" label.  

Friday, June 18, 2010

How to Clip Your Hair So It's Flat Under a Sheitel

Posted by Unknown at 12:39 PM 4 comments


I found clips that will work for long thick hair on amazon here.
 

Ask Chavi Copyright © 2010 Designed by Ipietoon Blogger Template Sponsored by: Website Templates | Premium Themes. Distributed by: blog template